
Day six of World Origami Days 2015 and today’s model is the Traditional Origami Swan.
Like most traditional origami models, the Traditional Swan is very angular in appearance, and quite abstract. It is representative rather than realistic. In this case, it’s the long neck that marks it out as a swan.
Also like most traditional origami, it is very easy to fold! The origami swan instructions I have given below is as simple as possible and only uses simple ordinary folds – there aren’t even any reverse folds in these steps. As a result, this is another model that is very good to fold with children. It takes less than five minutes to make, so you should be able to fold it with them before they lose interest!
The only challenges are that there aren’t any reference points for how far up you fold the neck, and how big you make the head. This is a judgement call and you can always adjust the angle of the neck again afterwards if needed. If you fold the neck too far forward, the swan won’t stand up – it will fall flat on its face!
Any square piece of paper will do for this model, although as it’s a swan, you might like to stick with white, or black. I like to use kami which is grey on one side and white on the other as this gives a nice contrast in the wings as the picture shows.
For a bit of variation, you might like to try adding some crimps in the neck to give it a pleasing swan-like curve.
Difficulty: Simple
Time to fold: Less than five minutes
Paper: Any square piece of paper. White or black recommended.
Origami Swan Diagrams
| Step | Diagram |
|---|---|
| 1. Start with a square piece of paper, coloured side up |  |
| 2. Fold the paper in half and unfold |  |
| 3. Fold the edges in to the centre line |  |
| 4. Turn the paper over | |
| 5. Fold the edges in to the centre again | 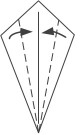 |
| 6. Fold the bottom point to the top | 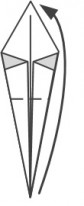 |
| 7. Fold the narrow tip down a bit. This will form the head | 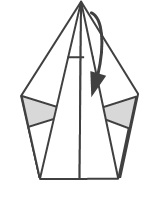 |
| 8. Mountain fold the model in half, so that the neck and head are on the outside | 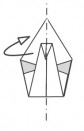 |
| 9. Lift the head and neck up a bit and squash the model flat when the neck is at an angle you like | 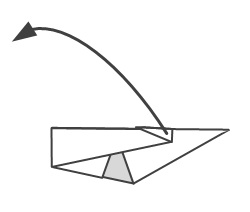 |
| 10. Lift the head up to an angle you like and squash the model flat |  |
| 11. You have completed the swan |  |
Get Involved
I’d love to hear your views on this paper folding swan or any other beginner origami models. Feel free to let me know what you think in the comments below, or you find can me on Instagram or Twitter. Check out my Pinterest boards too!
Sign up for my origami newsletter here and get our free Origami eBook.