It occurred to Vimes that he knew absolutely nothing about Nobbs outside working hours. He couldn’t even remember where the man lived. All these years he’d known the man and he’d never realised that, in his secret private life, Corporal Nobbs was a bit of a peacock. A very short peacock, it was true, a peacock that had been hit repeatedly with something heavy, perhaps, but a peacock nonetheless. It just went to show, you never could tell.
Terry Pratchett, Guards! Guards!
About the Origami Peacocks
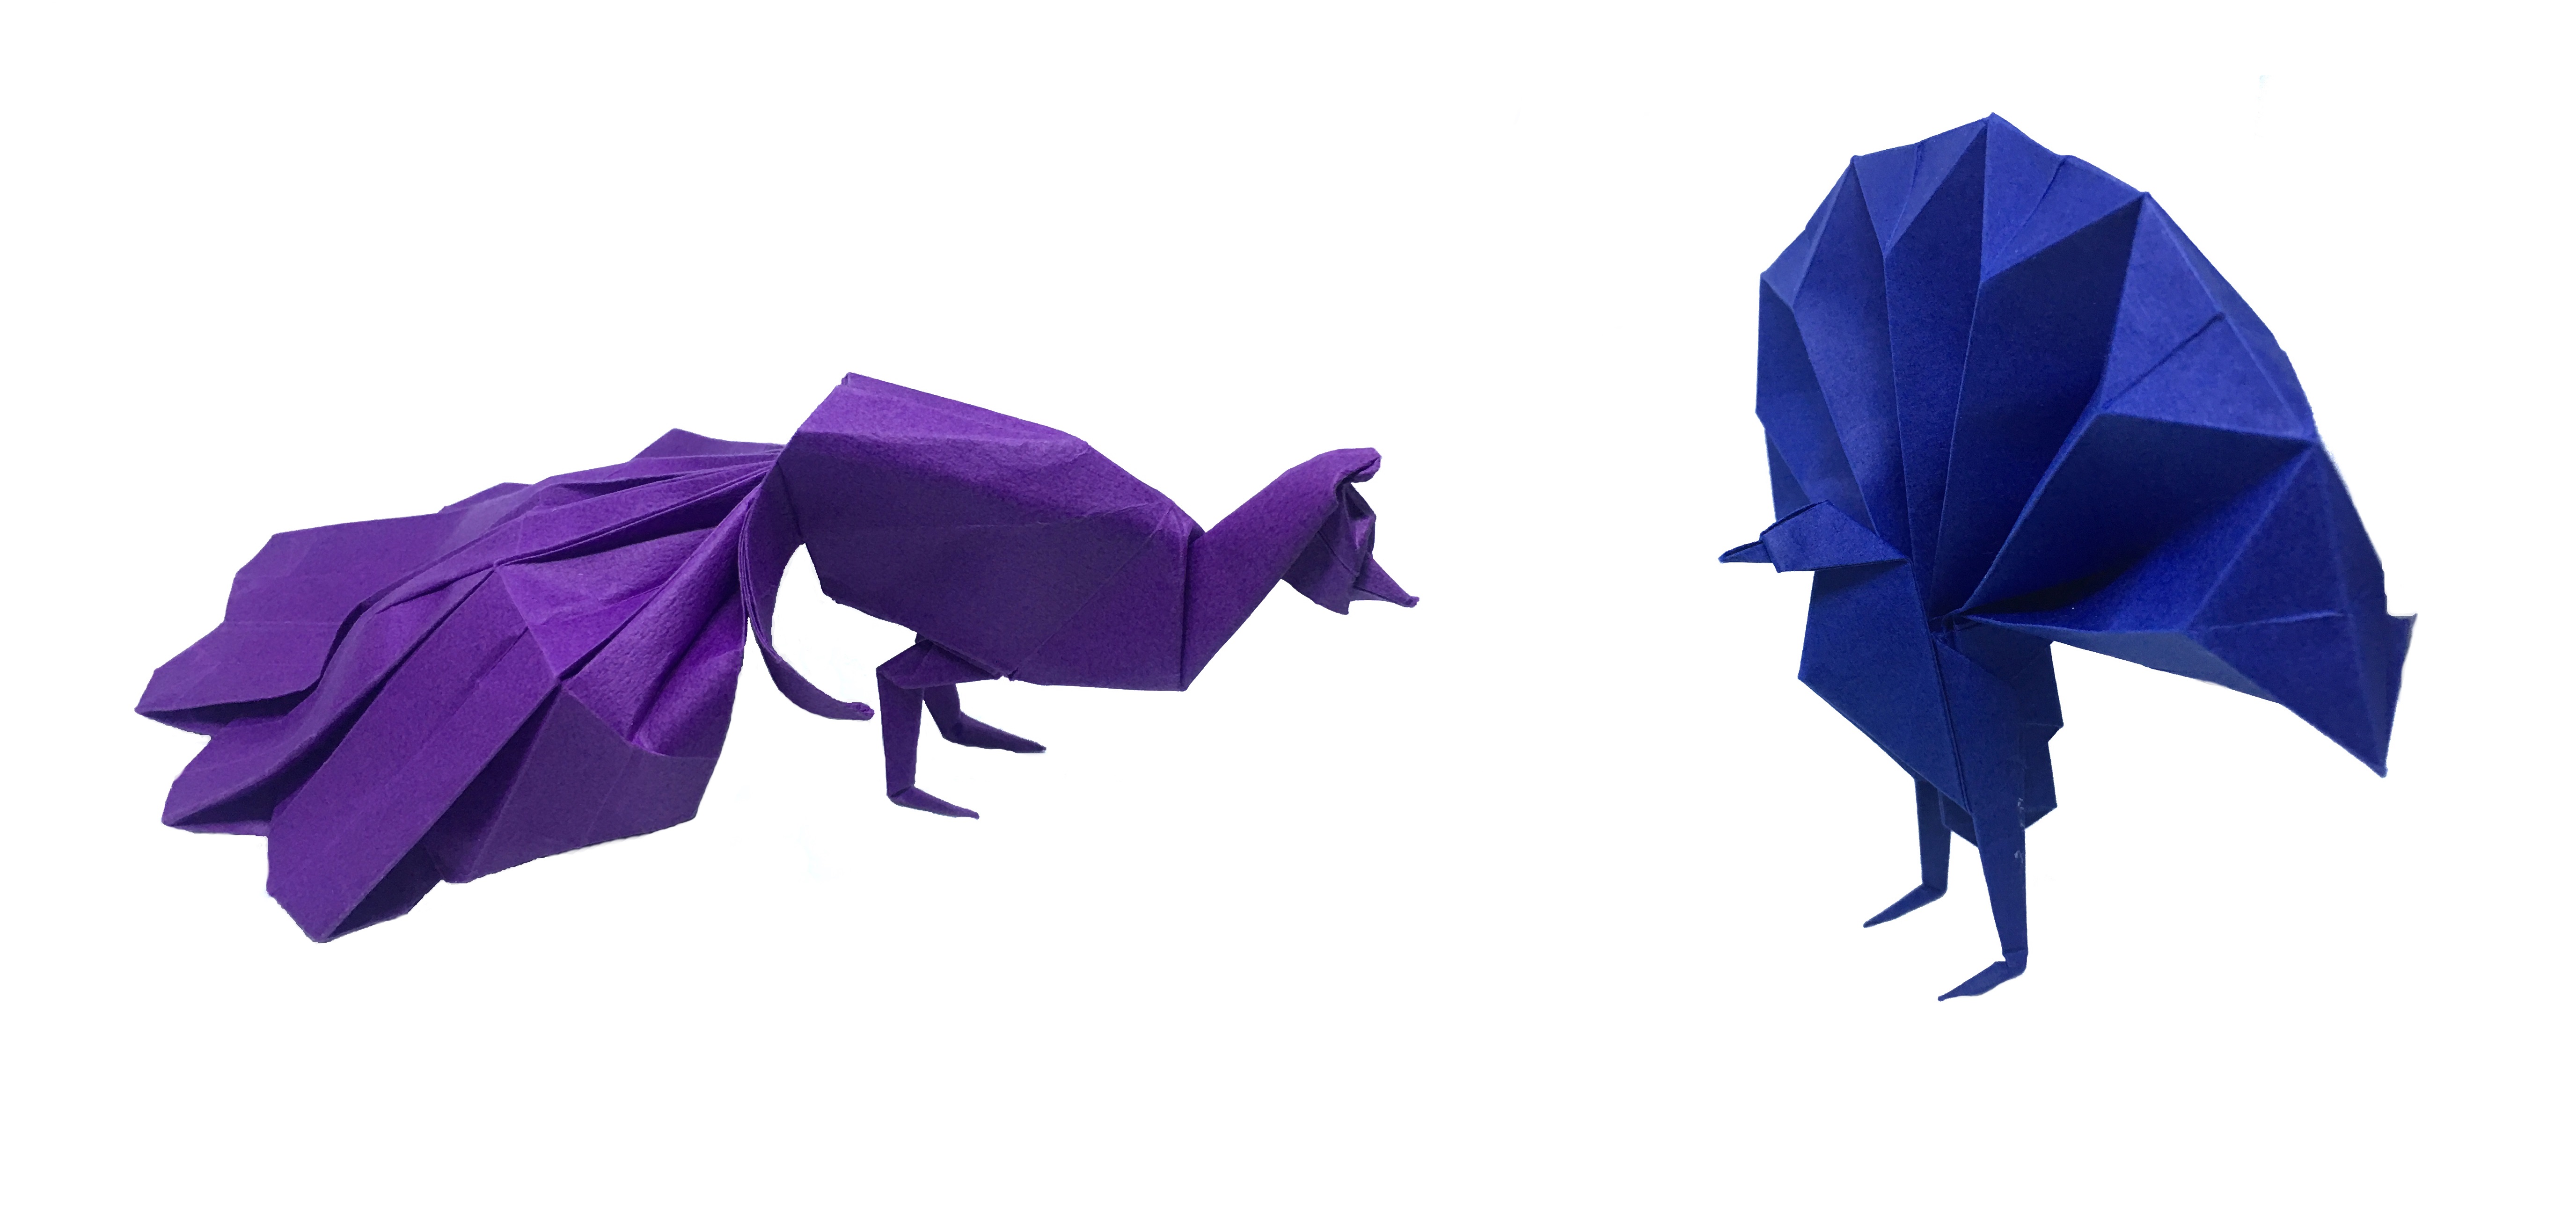
The last class I attended at the British Origami Society Convention last month was taught by David King. He showed how to make one of Neal Elias’s Origami Peacocks. The class was popular , and as a result we ran out of time and I didn’t get a chance to finish the tail properly. I wanted to have another go when I got home. The purple peacock in the picture is the result. I like this model because it is unusual. It’s unmistakably a peacock, but unlike almost every other origami peacock design out there, this one isn’t displaying it’s tail. Neal Elias did design a peacock with its tail on show though, it’s the blue one in the picture.
Note: This post contains affiliate links. See Disclosure below for more information.
These are not the first Neal Elias designs I’ve featured on this blog. If you like these, you might also want to check out The Last Waltz, and Llopio’s Moment of Truth.
Folding the Origami Peacocks
Like so much of Neal Elias’s work, both these origami peacocks are box pleated models, so folding accurately from the first crease is important if the final model is to look attractive. They are both intermediate level designs, so if you want to make an origami peacock but you feel a bit intimidated by these you can find instructions for a simple origami peacock in this video. I’d watch it with the sound turned down though – the music is repetitive and gets irritating after about three minutes.
The blue one (charmingly called Peacock 1) is the slightly easier of the two as it uses a 16 x 16 grid, whereas the purple one (Peacock 2, naturally enough) uses a 32 x 32 grid, so needs a slightly larger sheet of paper. I used a 20cm x 20cm (just under 8 inches a side) square for Peacock 1, which produced a model that stands 10.5cm (4.2in) tall with a tail that is 13cm (5.1in) wide. For Peacock 2 the paper was 35cm x 35cm (13.7in x 13.7in) and the final model is 19cm (7.4in) long, and 6cm (2.4in) tall.
There’s only one move in Peacock 1 that is slightly complicated. It’s a sort of spread-sink affair in the middle of the model where a lot of the layers move at the same time about halfway through the folding sequence. It feels a bit cumbersome the first time, but flows pretty well the next time you try it.
There’s nothing earth-shatteringly complex in Peacock 2, but you do have to be careful as the folding progresses. There are a couple of sink folds that could rip the paper, and the point behind the peacock’s neck gets very thick and could rip when the tail is reverse folded through the model.
I’ve folded both of these origami peacocks out of tant paper. You could use something like tissue foil and I have made both of these using large-sized sheets of standard origami paper, I think tant is a bit more robust, yet still flexible. This benefits both models. It makes the tail on Peacock 1 that little bit stronger, and eases some of the paper tension behind the neck in Peacock 2. You do have to wet-finish Peacock 2 though and hold it together with a clip while it dries or you end up with a very fat peacock! Tank paper is available from The Origami Shop – click here to check availability and prices.
It takes about 45 minutes to fold Peacock 1, and a little over an hour to fold Peacock 2. Those timings are for me anyway and I’m not the fastest folder. At the Convention, David King knocked out a practice version of Peacock 2 before the class in about half an hour!
Instructions for Neal Elias’s Origami Peacocks
The diagrams for both of these Peacocks are in the book The Origami of Neal Elias which I bought at the BOS Convention. I will write a review of this book soon, but for now, I’ll just say thank-you to Dave Venables for the many hours of dedication in putting this book together.
This is destined to be a ‘must-have’ for anyone that enjoys folding paper. I have featured several models from the book on this blog including Andres Segovia and The Last Waltz. You can get the book from the British Origami Society or on Amazon here.
Get Involved
I’d love to hear your views on these origami peacocks. Feel free to let me know what you think in the comments below, or you find can me on Instagram or Twitter. Check out my Pinterest boards too!
Sign up for my origami newsletter here and get our free Origami eBook.
Disclosure: This post contains affiliate links. This means we will receive a small commission for some purchases made using links in our blog with no additional cost to you. Please be assured we would not promote any product unless we believe that our readers will also benefit. The commission does not influence the editorial content of this site.
As an Amazon Associate, I earn from qualifying purchases. Origami Expressions is a participant in the Amazon Services LLC Associates Program, an affiliate advertising program designed to provide a means for sites to earn advertising fees by advertising and linking to amazon.com, amazon.co.uk, amazon.ca. Amazon and the Amazon logo are trademarks of Amazon.com, Inc. or its affiliates.