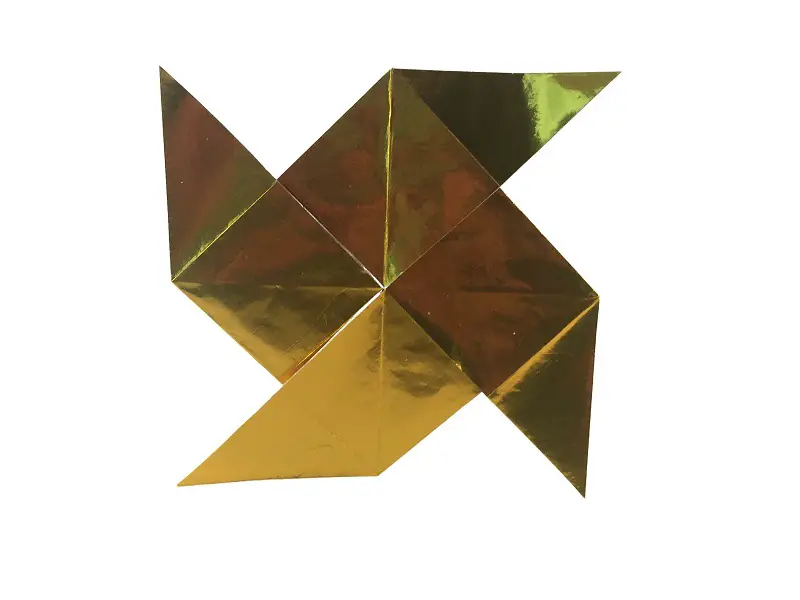
This traditional origami windmill model is better known as Pinwheel in the USA. It’s another one of those designs like a paper airplane that a lot of people will be familiar with from their childhood, but might not immediately recognise as origami, simply because they’ve never thought about it that way.
Note: This post contains affiliate links. Please see disclosure for more information.
It’s very simple to make and takes less than five minutes. The origami windmill is a great model for beginners or children to fold. (Check out more easy origami models for kids here.)
If you attach the finished paper pinwheel to a stick or a length of dowling rod it will spin round in the wind quite successfully. If you do intend to do this, use some quite thick paper so that it doesn’t get destroyed in the first puff of wind. The more colourful the paper you can find, the better! I’ve made this windmill out of gold foil paper.
Why not try making several paper pinwheels and arranging them at different heights in a plant pot? Just remember to bring them inside when it rains. I will be writing about how to preserve origami models in a later post.
Difficulty: Simple
Paper: Something reasonably thick and brightly coloured! If you need some origami paper, I recommend using folded square, which you can order here.
Time to fold: About 5 minutes.
Origami Windmill Instructions Step by Step
| Step | Diagram |
|---|---|
| 1. Start with a square of paper, white side up |  |
| 2. Fold the paper in half, edge to edge |  |
| 3. Fold both edges in to the centre line | 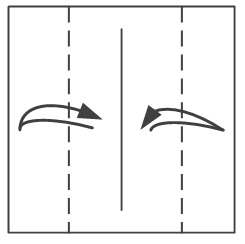 |
| 4. Fold the top edge to the bottom edge and unfold | 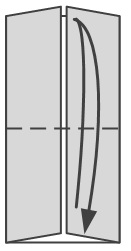 |
| 5. Fold the top and bottom edges to the centre line and unfold | 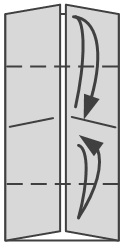 |
| 6. Fold the right edge up to meet the crease line made in the previous step and unfold | 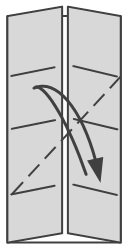 |
| 7. Fold the left edge up to meet the crease line made previously and unfold | 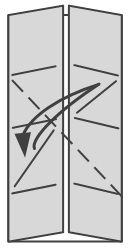 |
| 8. Squash fold the bottom: open up the layers at the bottom and fold the sides out along the creases made in the previous step. The bottom edge will automatically want to fold up to the middle line. See the next picture for the result. | 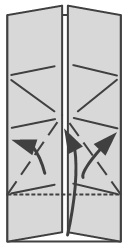 |
| 9. Repeat the squash fold at the top. | 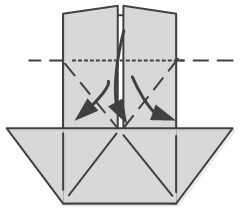 |
| 10. Fold the bottom right flap down so the edge lies along the centre crease. | 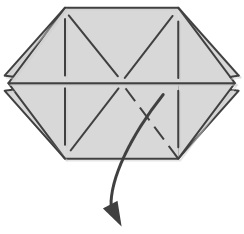 |
| 11. Fold the top left flap up so the edge lies along the centre crease | 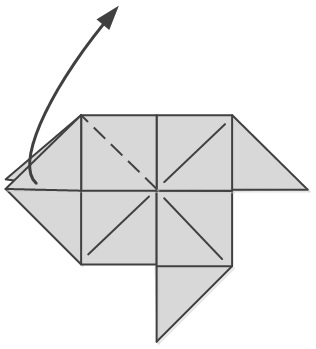 |
| The completed windmill | 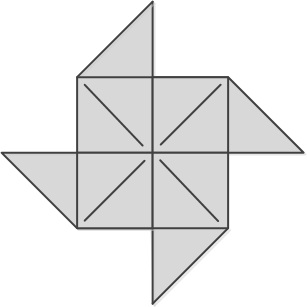 |
To make the origami pinwheel spin, push a map pin (like this) through the centre and attach it to a stick or a length of wooden dowling rod. The origami windmill will spin if you tap it with your finger, blow on it, or take it outside if there is a light breeze.
Get Involved
I’d love to hear your views on this origami windmill/pinwheel or any other beginner origami models. Feel free to let me know what you think in the comments below, or you find can me on Instagram or Twitter. Check out my Pinterest boards too!
Sign up for my origami newsletter here and get our free Origami eBook.
Disclosure:
This page contains affiliate links and I may receive some small commission for purchases made through the links on this page. This hasn’t affected my decision to recommend a product – I value my personal and professional reputation and would not endorse a product or supplier I did not believe in. There is no additional cost to you for purchasing through this page.
As an Amazon Associate, I earn from qualifying purchases. Origami Expressions is a participant in the Amazon Services LLC Associates Program, an affiliate advertising program designed to provide a means for sites to earn advertising fees by advertising and linking to amazon.com, amazon.co.uk, amazon.ca. Amazon and the Amazon logo are trademarks of Amazon.com, Inc. or its affiliates.